Creating templates for product catalogues
Before it is possible to add some objects into product catalogues, a pair of layouts must exists. In this article, we’ll show you the good practice of creating product catalogue layouts.
Let’s take an example of “Book” objects we defined in the previous example and create a layout pair to add and edit books on site.
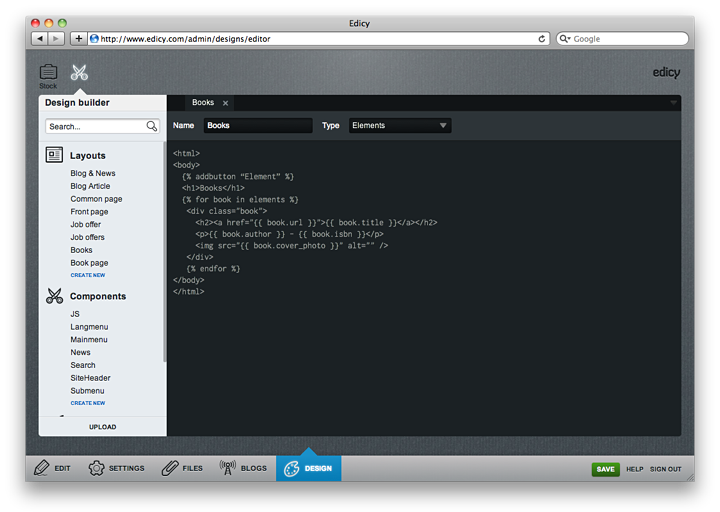
First, create a layout with type “Elements” named “Books” that will list all the books and contains a link to the page where user can add new books. That layout should look like this:
<html>
<head>
  <meta charset="utf-8" />
  <title>Element list example</title>
</head>
<body>
  {% addbutton "Element" %}
  <h1>Books</h1>

  {% for book in elements %}

  <div class="book">

    <h2><a href="{{ book.url }}">{{ book.title }}</a></h2>

    <p>{{ book.author }} - {{ book.isbn }}</p>

    <img src="{{ book.cover_photo }}" alt="" />

  </div>

  {% endfor %}
 </body>
</html>
Now, let’s look at this template in detail. The first interesting piece here is {% addbutton %} tag. This thing generates a link to the page where user can add new book to the site. The link will be displayed only in edit mode so there is no need to add any conditionals around this tag.
All objects created from this page will be associated with this page. It works the same way as blog articles belong to a blog page and you can create multiple pages to create separate list of objects. There can even be multiple pages containing lists of different kind of objects (e.g “Book” and “Magazine”).
Next interesting row in this layout is a {% for %} loop that iterates over the list of objects created on this page. A special variable named "elements" is available on the page that has been created with “Elements” layout type. Inside iteration you access the object and usually you’d want to link to the page where you display all the information about the object. But you can be a rebel and list all the information of all objects on one page. It’s your call.
To link to the object page, you can use a magic “url” variable of an object. In this example, it’s book.url:
<a href="{{ book.url }}">{{ book.title }}</a>
Another magic variable is “title” that exists for all objects as well. It is mandatory and should be used to name your object.

Object page layout
Now when we have set up some links that point to the object page, it is good idea to create it’s layout as well.
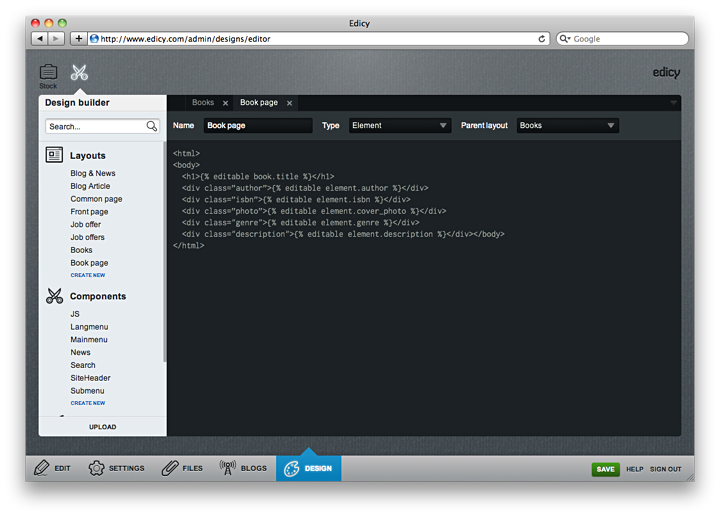
Create a layout with type “Element” and choose “Books” layout as it’s parent layout. We’ll name this layout as “Book page”. Let our layout look contain the following code:
<html>
<head>
  <meta charset="utf-8" />
  <title>Element example</title>
</head>
<body>
  <h1>{% editable element.title %}</h1>
  <div class=”author”>{% editable element.author %}</div>
  <div class=”isbn”>{% editable element.isbn %}</div>
  <div class=”photo”>{% editable element.cover_photo %}</div>
  <div class="genre">{% editable element.genre %}</div>

 <div class="description">{% editable element.description %}</div>

</body>
</html>
For some of you, {% editable %} tag may be familiar from the blog article page, that makes a field editable in edit mode and displays the data in public. This tag is smart enough to render the correct editable control for attribute - be it text field, select list or checkbox or something else.

